.jpg)
Typora 加图床
Typora 是一款非常好用的 Markdown 的编辑器
最近有在学习微服务,但光靠文字描述还是无法完整的记录一些知识点。 于是潜心研究了一下Typora所支持的图床
该文章适用于 macos linux windows 可以参考下配置找到文中所提及的配置。
需要同学们有以下几点要求,方可流畅阅读
- 熟悉
node操作 - 熟悉
oss - 熟悉
linux - 熟悉
json
Typora 所支持的图床
分别是 iPic 、uPic 、PicGo ,其中 PicGo 分为 客户端 和 cli 两个版本,cli 的资源消耗较少,所以我们最终选择使用 PicGO-Core 。
PicGo-Core
需要先安装 Node.js ,打开 macOs 的 终端 ,如果你还不知道什么是 brew 可以看这里 Mac必备神器Homebrew ,macOs 上非常好用的包管理工具。
brew install node
我们测试一下node是否安装成功:
node -v
npm -v
node 安装成功后即可安装我们的 PicGo-Core
npm install picgo -g
npm 执行速度过慢的话,我们可以使用一下 淘宝的镜像 cnpm
# 你可以使用淘宝定制的 cnpm (gzip 压缩支持) 命令行工具代替默认的 npm
npm install -g cnpm --registry=https://registry.npm.taobao.org
2022-10-31 更新
windows 用户如果安装node版本的picgo无法使用命令行调用的话
请先安装 windows 包管理工具 chocolatey
运行choco install picgo
后面操作相同
PicGo-Core 安装完成以后测试一下是否安装成功
picgo -v

以下是参照PicGo-Core官方文档的进行的配置
首先我们需要找到我们的配置文件
picgo的默认配置文件为~/.picgo/config.json。其中~为用户目录。不同系统的用户目录不太一样。
linux和macOS均为~/.picgo/config.json。
windows则为C:\Users\你的用户名\.picgo\config.json。
配置文件需要至少有如下的配置项:
{
  "picBed": {
    "uploader": "smms" // 代表当前的默认上传图床为SM.MS
  },
  "picgoPlugins": {} // 为插件预留
}
picBed.aliyun
阿里云OSS的相关配置。可以查看PicGo的wiki进行配置。
默认值如下:
{
  "accessKeyId": "",
  "accessKeySecret": "",
  "bucket": "", // 存储空间名
  "area": "", // 存储区域代号
  "path": "", // 自定义存储路径
  "customUrl": "", // 自定义域名,注意要加http://或者https://
  "options": "" // 针对图片的一些后缀处理参数 PicGo 2.2.0+ PicGo-Core 1.4.0+
}
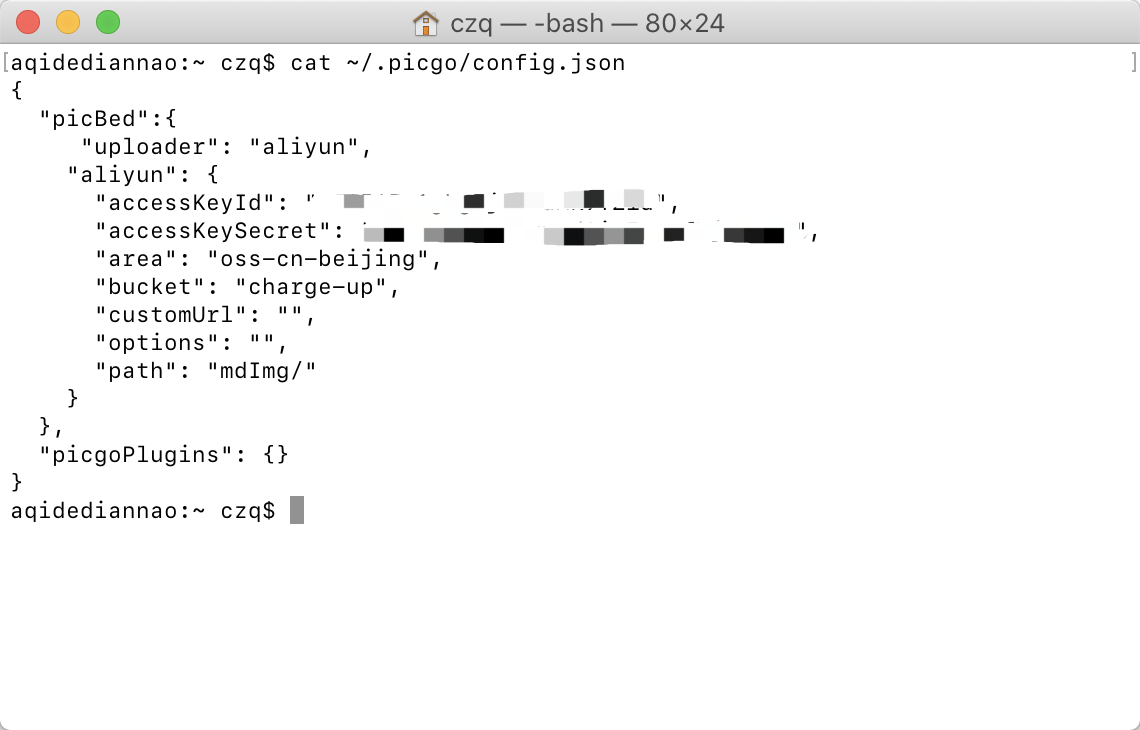
如有 阿里云oss 的同学可以根据我的配置来,使用 vim ~/.picgo/config.json 进入修改
{
  "picBed":{
    "uploader": "aliyun",
    "aliyun": {
      "accessKeyId": "XXXXXXXXXXXXXXXXXXXX",
      "accessKeySecret": "XXXXXXXXXXXXXXXXXX",
      "area": "oss-cn-beijing", // 地域名 我这里是 华北2(北京)
      "bucket": "charge-up", // 你存储空间的名称
      "path": "mdImg/" // 自定义存储空间下的文件夹名称
    }
  },
  "picgoPlugins": {}
}
vim 按 i 进入输入模式,如果想要保存,需要先按一下 Esc 键,然后输入:wq! 强制保存并退出
cat ~/.picgo/config.json 查看我们修改的文件。
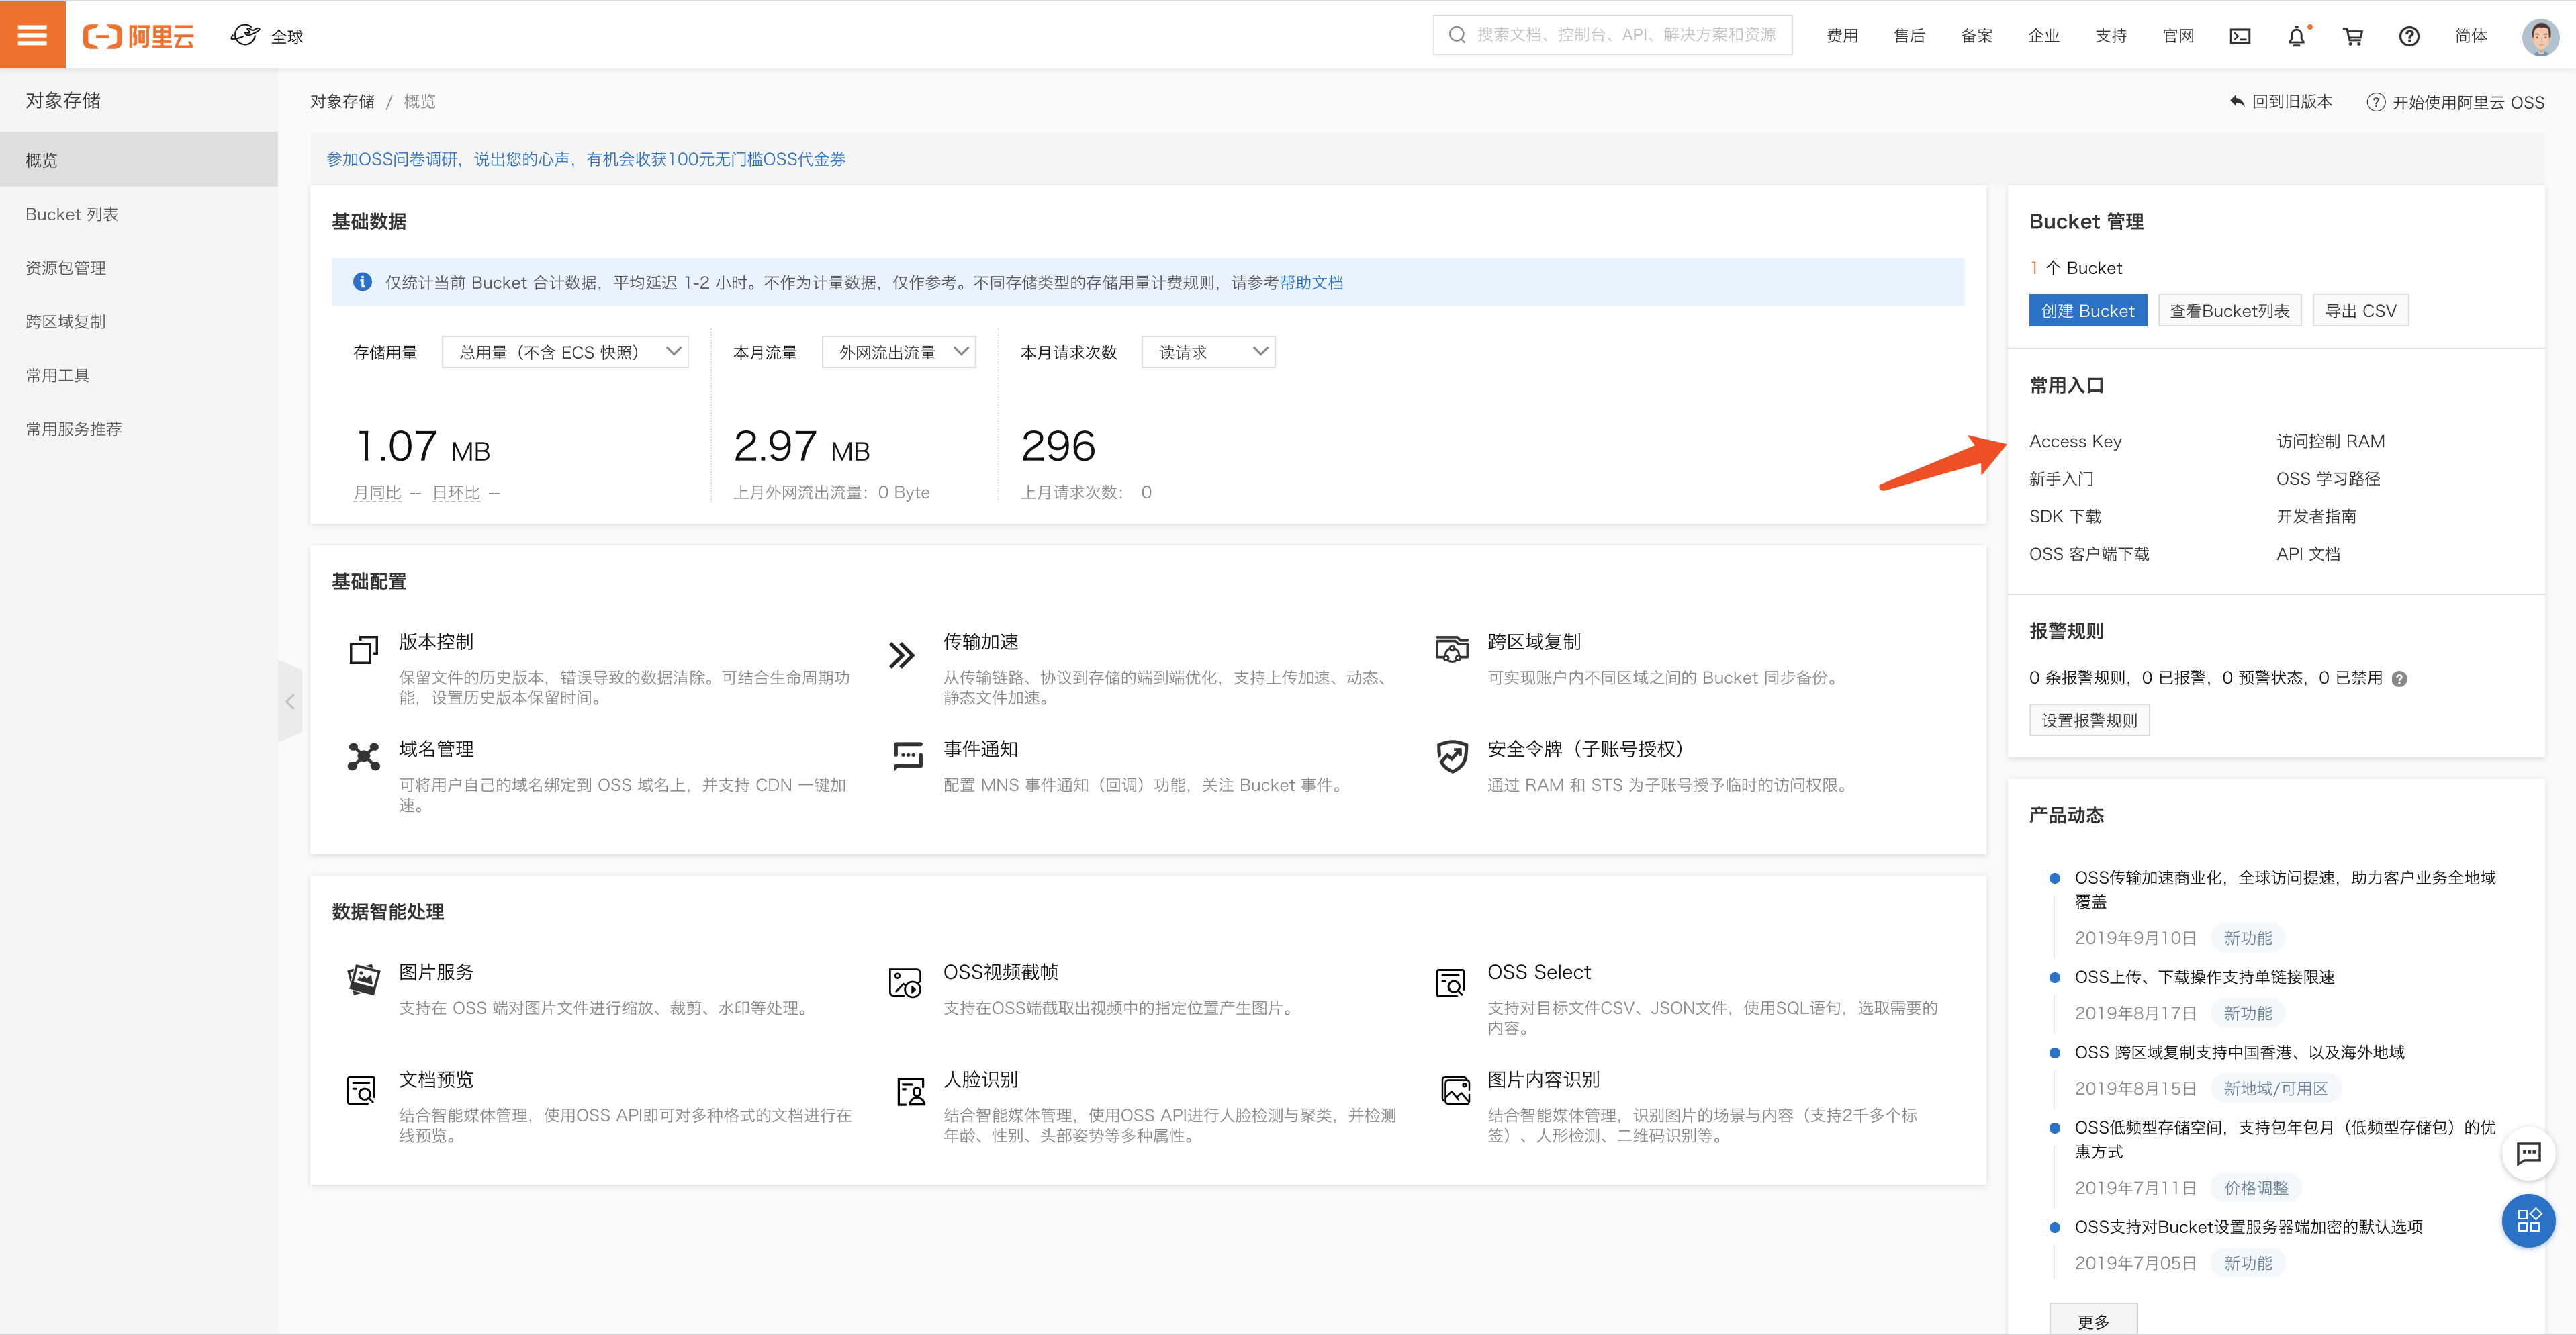
accessKeyId 和 accessKeySecret 需要在这里根据提示获取
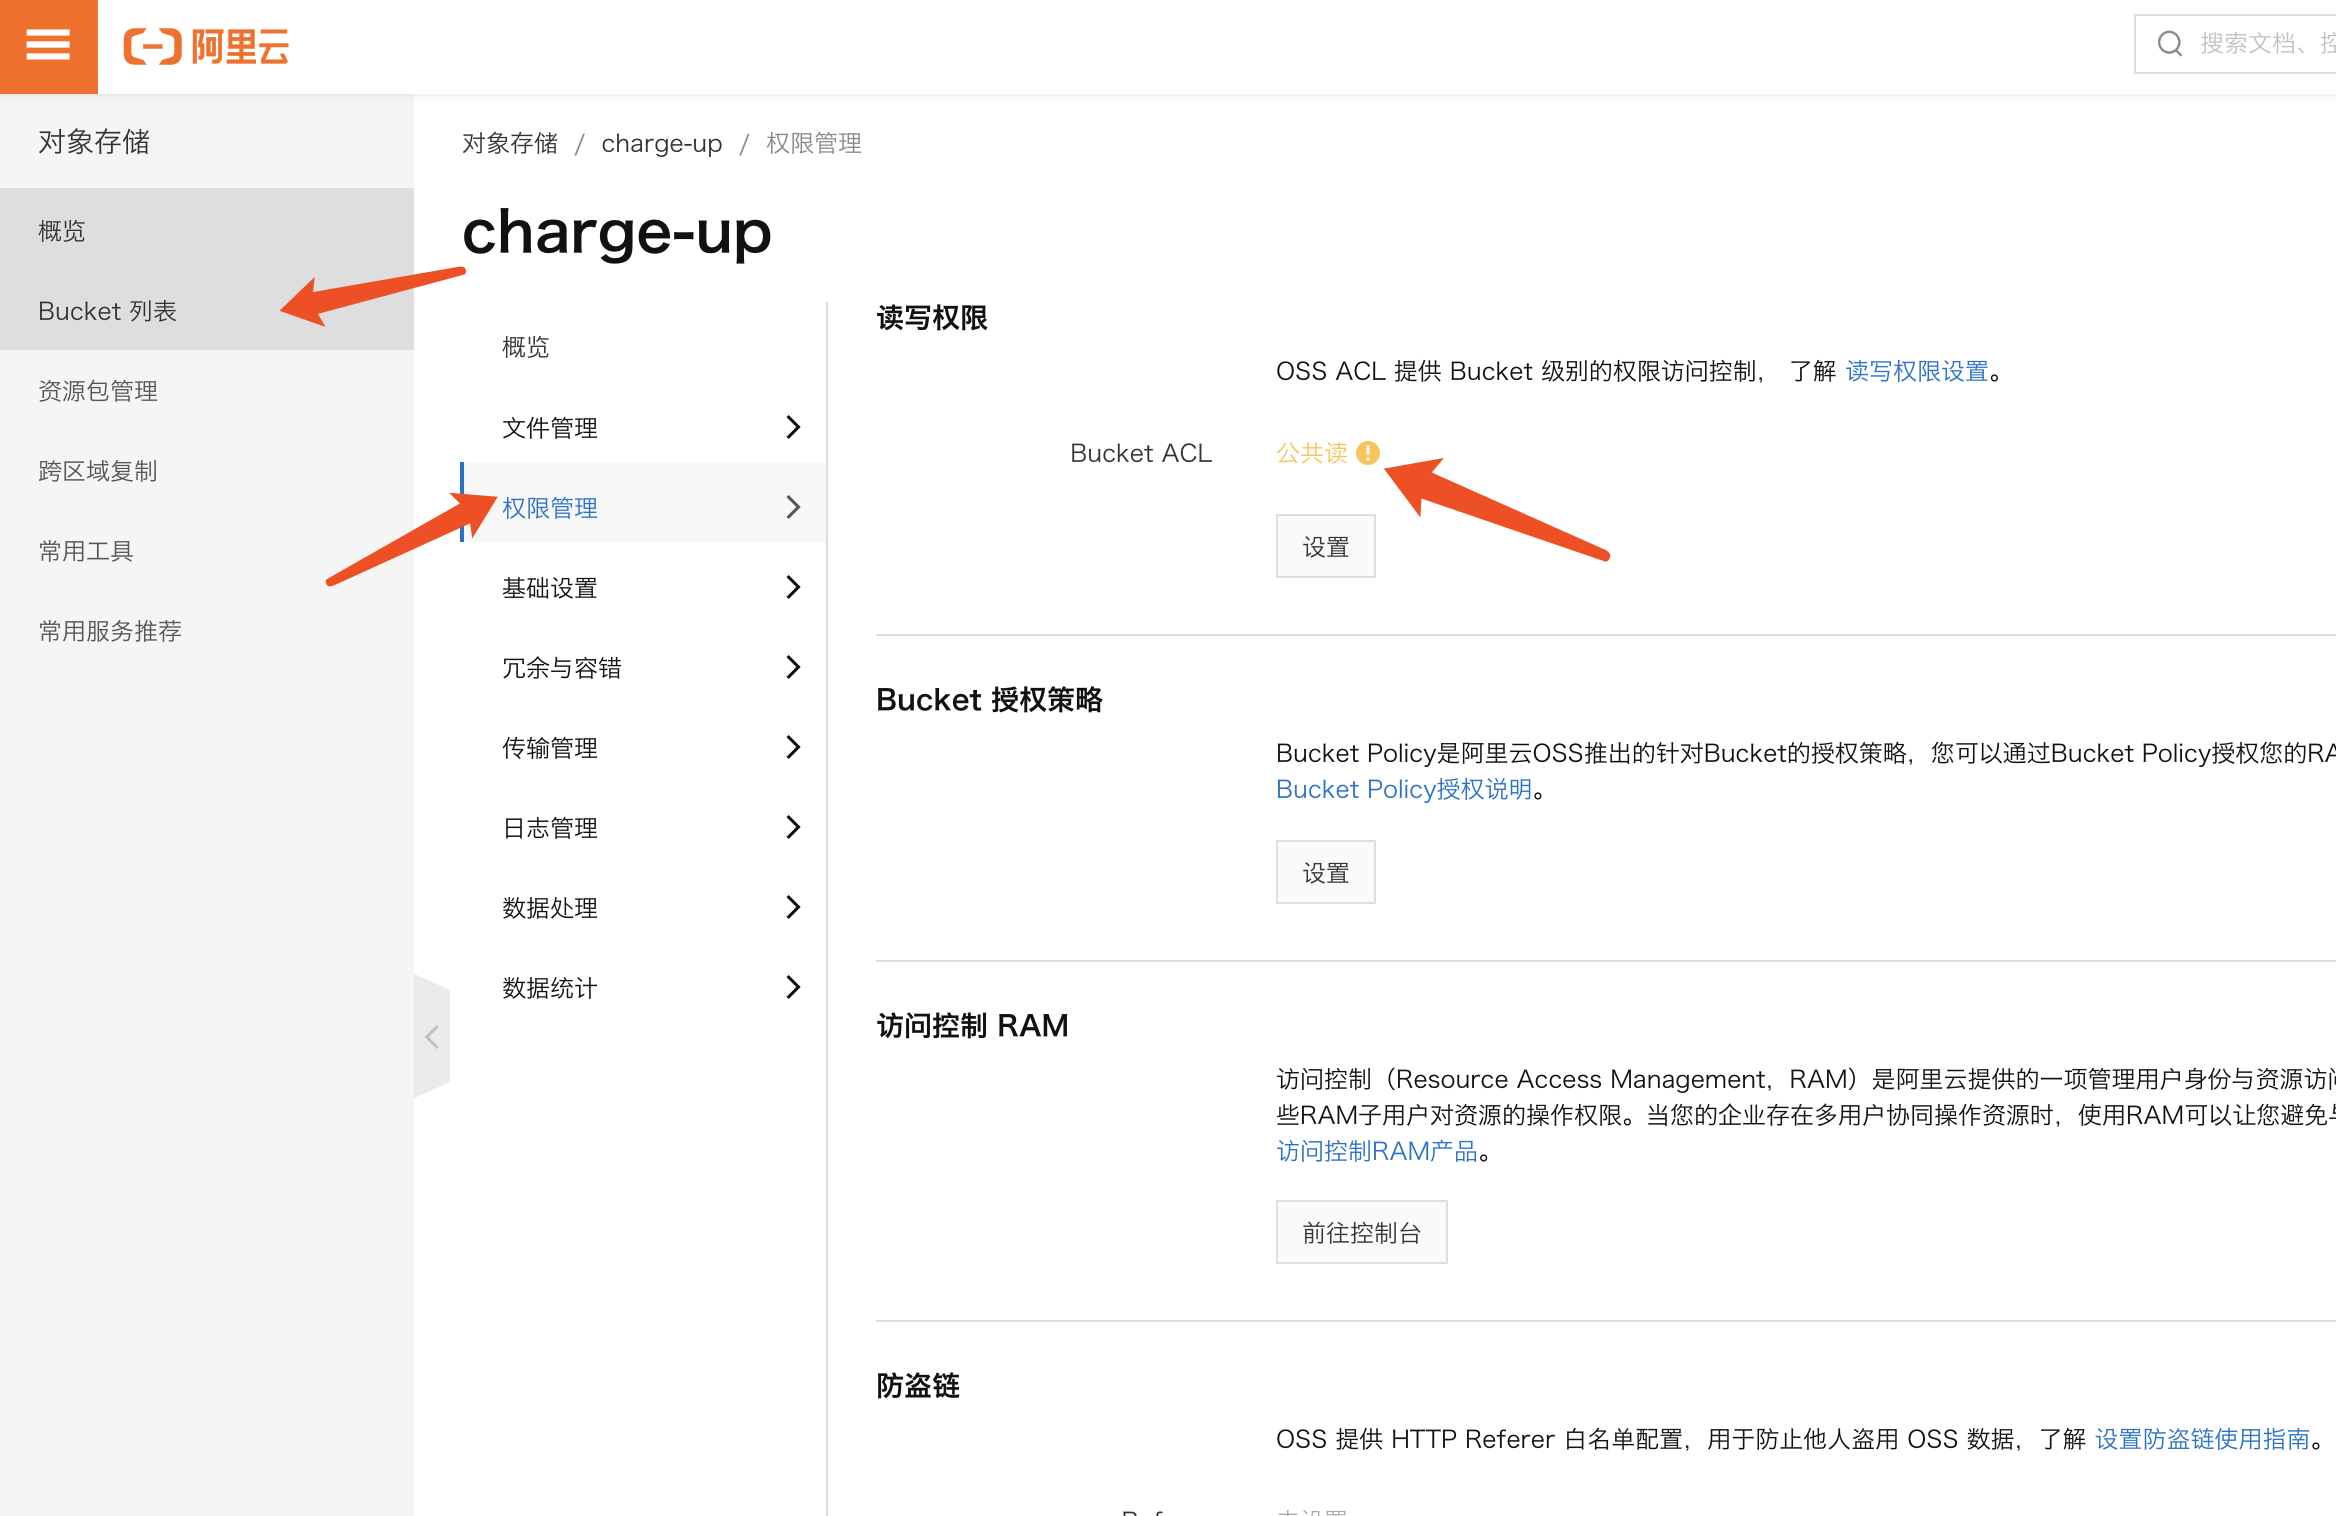
接着我们设置我们的权限,这里如果不是公共读的话,直接生成的连接是无法访问的
回到 Typora 中
Typora 的文档中告诉我们 PicGo-Core 如何使用
Then you can input “which picgo” in terminal to get its actual installed location, then, select “Custom Command” as the “Image Uploader” function and input “[your node path] [your picgo-core path] upload” as the command. If you have “node” and “picgo” installed in system PATH directly, you could also fill “picgo upload” as the custom command directly.
重点是这里 “[your node path] [your picgo-core path] upload”
我们需要找到 node 和 picgo-core 的路径
which node
which picgo
# node 可以自行查看版本号后在写
/usr/local/Cellar/node/13.8.0/bin/node
# picgo
/usr/local/lib/node_modules/picgo/bin/picgo
最终拼合语句
/usr/local/Cellar/node/13.8.0/bin/node /usr/local/lib/node_modules/picgo/bin/picgo upload
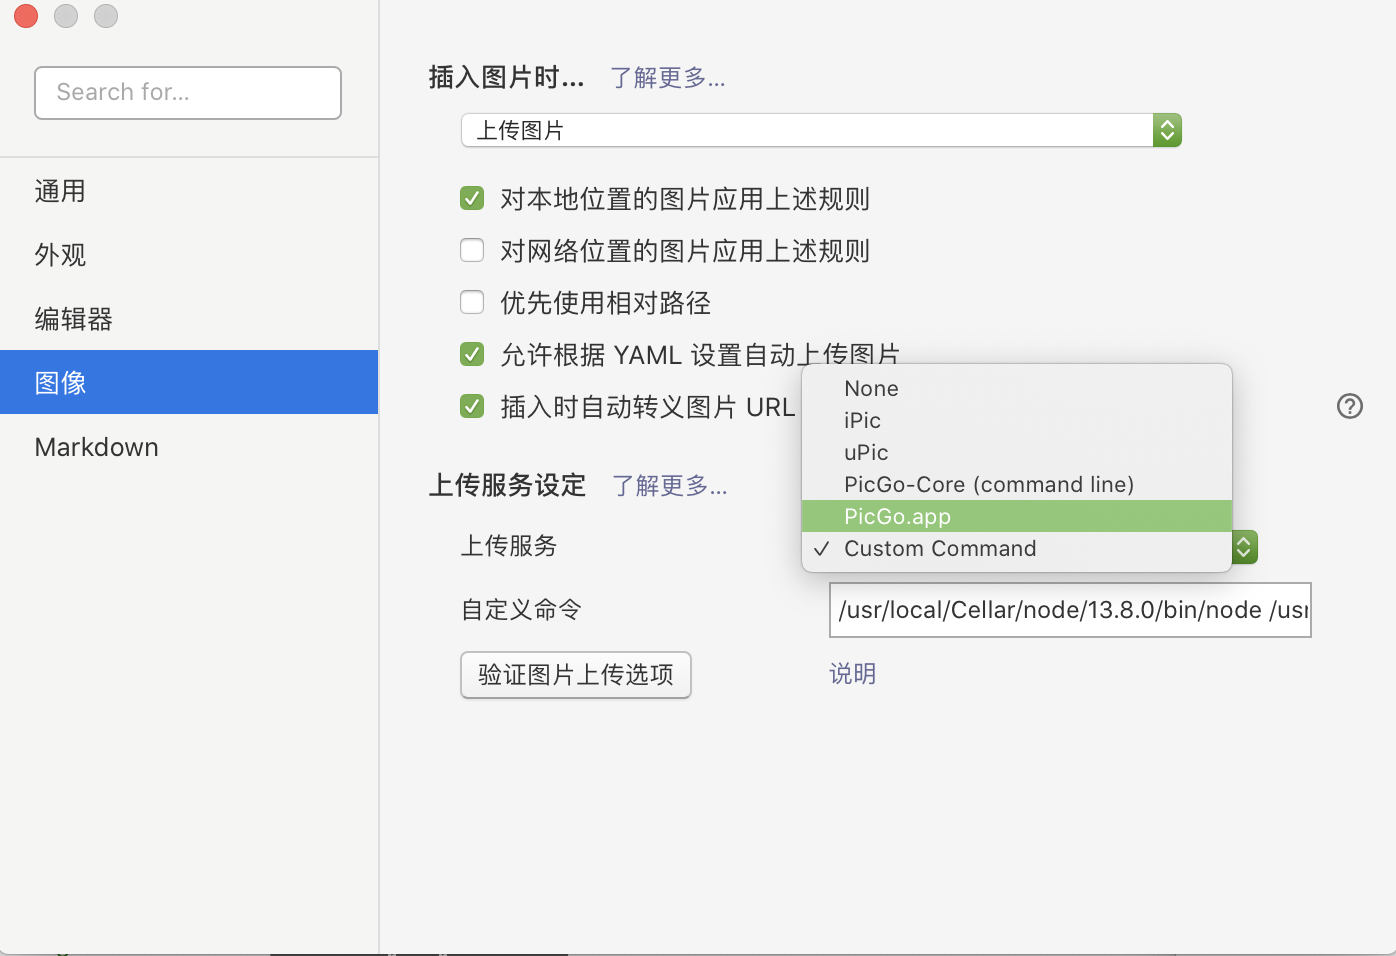
选择
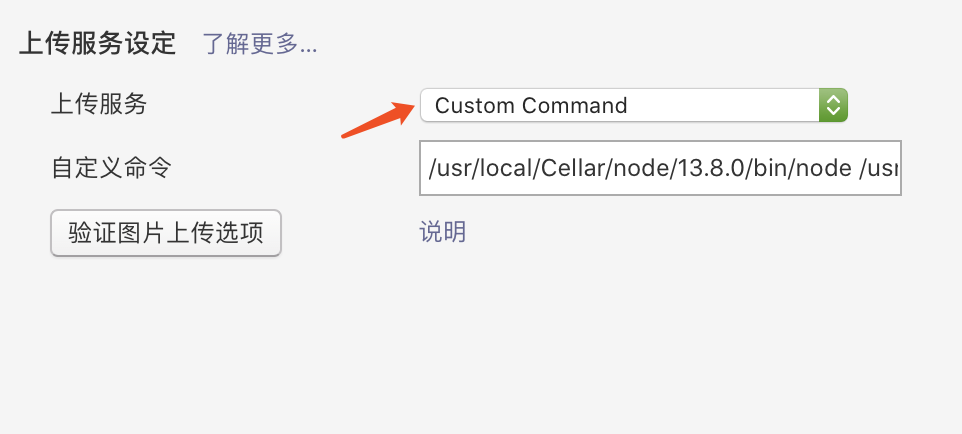
将以上命令复制到下面 点击 验证图片上传选项 验证即可

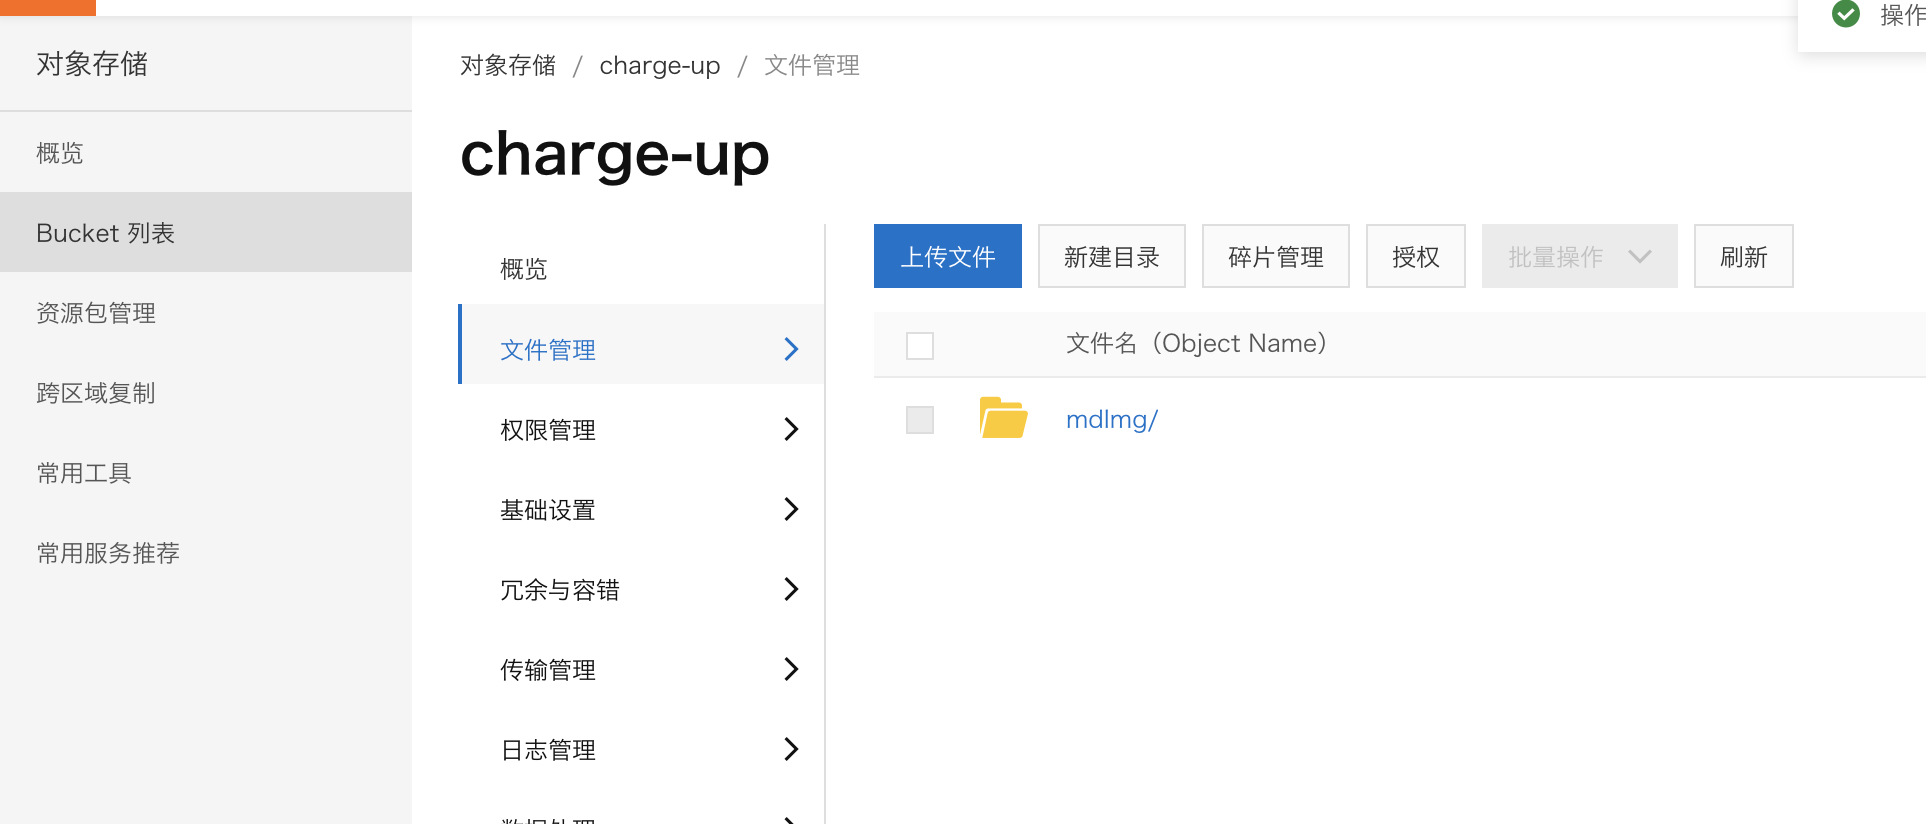
这时候我们的图床就配置好了,我们可以打开我们的阿里云oss 看下是否已经上传上去了

上传的图片重命名
picgo install rename-file
然后打开你的配置文件
{
  "picBed": {
    "uploader": "aliyun",
    "aliyun": {
      "accessKeyId": "xxxxxxxxxxxxxxx",
      "accessKeySecret": "xxxxxxxxxxxxxxx",
      "bucket": "xxxxxxxxxxxxxxx",
      "area": "xxxxxxxxxxxxxxx",
      "path": "xxxxxxxxxxxxxxx/",
      "customUrl": "",
      "options": ""
    }
  },
  "picgoPlugins": {
    "picgo-plugin-rename-file": true
  },
  "picgo-plugin-rename-file": {
    "format": "{y}/{m}/{d}/{hash}-{origin}-{rand:6}"
  }
}
命名规则
- {y} 年,4位
- {m} 月,2位
- {d} 日期,2位
- {h} 小时,2位
- {i} 分钟,2位
- {s} 秒,2位
- {ms} 毫秒,3位(v1.0.4)
- {timestamp} 时间戳(秒),10位(v1.0.4)
- {hash},文件的md5值,32位
- {origin},文件原名(会去掉后缀)
- {rand:}, 随机数,表示个数,默认为6个,示例:{rand:32}、
- {localFolder:}, 表示层级 ,默认为1,示例:{localFolder:6}、